
General Settings
Add and manage users
What this does
A user is someone who can log into your WindoorERP database. Add as many as your team needs, and restrict what each one may see with access rights. Both can be changed at any time.
Steps
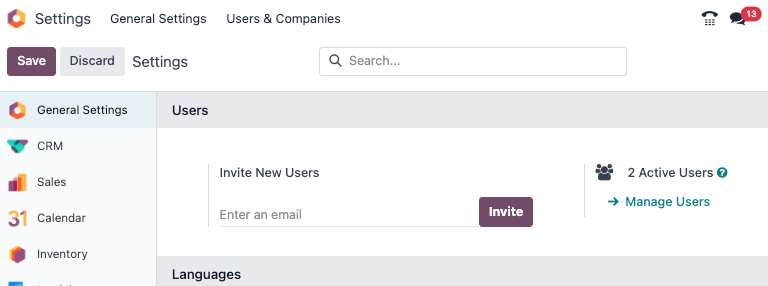
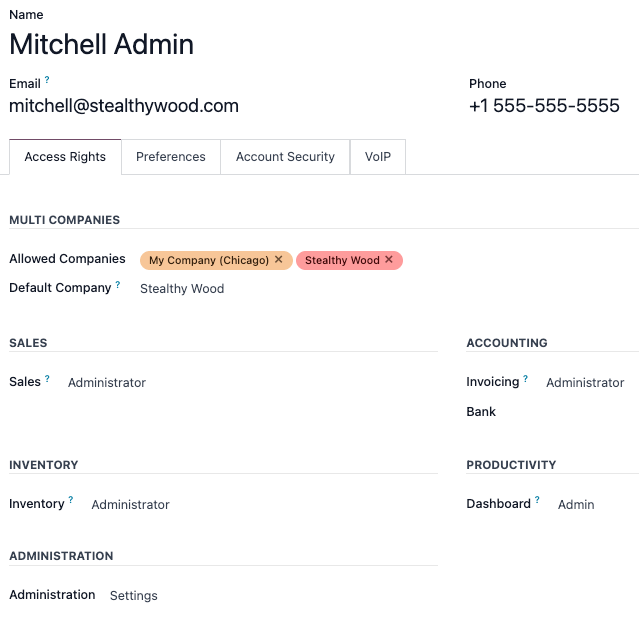
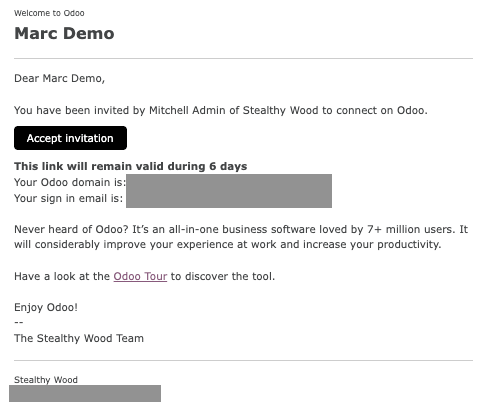
WindoorERP defines a user as someone who has access to a database. An administrator can add as many users as the company needs and, in order to restrict the type of information each user can access, rules can be applied to each user. Users and access rights can be added and changed at any point.
-
01
Go to Settings › Users › Manage Users and click New.
-
02
Fill in the name and the Email Address — the invitation is sent there.
-
03
Open the Access Rights tab and choose, for each application, the level this person needs. Only installed applications are listed.
-
04
Save. An invitation email goes out automatically.
-
05
The user clicks the link in that email to set a password and create their login.
Add individual users
To add new users, navigate to Settings app › Users section › Manage Users, and click on New.
Fill in the form with all the required information. Under the Access Rights tab, choose the group within each application the user can have access to.
The list of applications shown is based on the applications installed on the database.
After filling out all the necessary fields on the page, (Save manually). An invitation email is automatically sent to the user, using the email in the Email Address field. The user must click on the link included in the email to accept the invitation, and to create a database login.
User type
User Type can be chosen on the Manage Users page by clicking on the search bar, and then setting a filter for either Internal User or Portal User.
WindoorERP databases have three types of users: Internal User, Portal, and Public. Users are considered internal database users. Portal users are external users, who only have access to the database portal to view records. Public users are those visiting websites, via the website's frontend. See the documentation on users/user_portals.
The Portal user option does not allow the administrator to choose access rights. These users have specific access rights pre-set (such as, record rules and restricted menus), and usually do not belong to the usual WindoorERP groups.
User devices
For security purposes, when a user logs into the database, the various login information, such as the IP address, is stored in the user's profile. It is best practice to check this periodically, to ensure all access is from the user, and no one else has accessed the database.
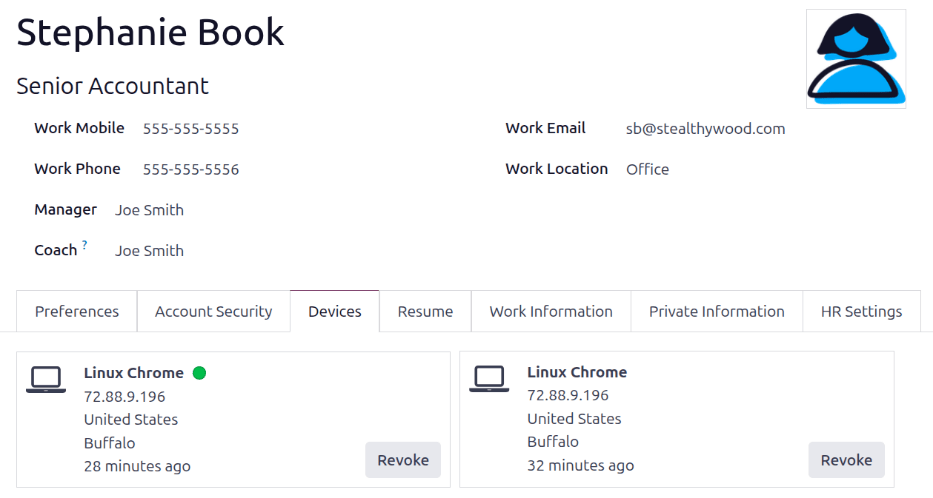
To check the logged-in devices, click the user icon in the upper-right corner, and click My Profile. This opens the user's profile in the Settings app. Click the Devices tab to view a Kanban list of all devices the user has logged into the database with. Any device currently logged into the system displays a green circle next to the device name on the Kanban card.
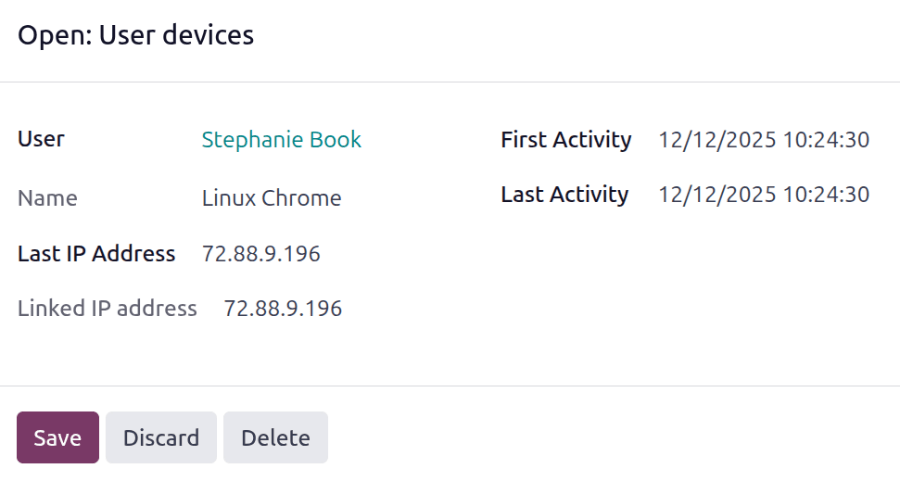
Click on a card to view the details for the device. Each card displays the User name, the Name of the device, the Last IP Address used as well as the Linked IP Address. It also shows the First Activity and Last Activity, which shows when the device first logged into the database, and the last time it was active on the database.
If a device is legitimate and should be retained, click Save.
If the device is legitimate but should not be retained, and does not pose a security risk, click Delete.
Revoke devices
If a listed device is not a legitimate user device, and could be a potential security risk, remove the device and revoke access by clicking the Revoke button.
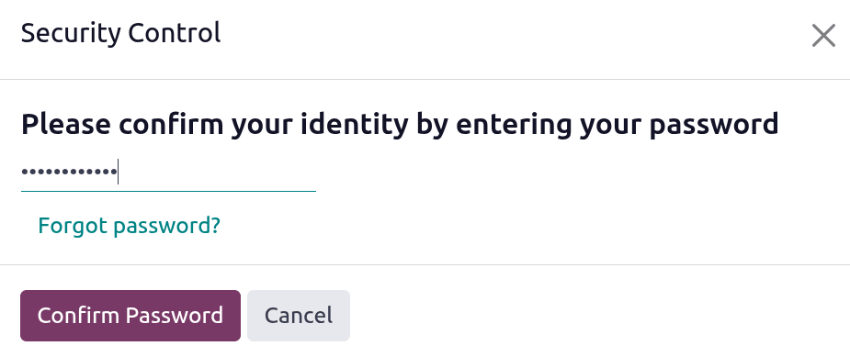
A Security Control pop-up window loads, asking to Please confirm your identity by entering your password. Enter the user's password, then click Confirm Password.
The device disappears from the Devices tab and can no longer be used to log into the database.
Deactivate users
To deactivate (i.e. archive) a user, navigate to Settings app › Users section › Manage Users. Then, tick the checkbox to the left of the users to be deactivated.
After selecting the appropriate user to be archived, click the (Actions) icon, and select Archive from the resulting drop-down menu. Then, click OK from the Confirmation pop-up window that appears.
Error: too many users
If there are more users in a WindoorERP database than provisioned in the WindoorERP Enterprise subscription, the following message is displayed.
When the message appears, the database administrator has 30 days to act before the database expires. The countdown is updated every day.
To resolve the issue, either:
Once the database has the correct number of users, the expiration message disappears automatically after a few days, when the next verification occurs.
Password management
Password management is an important part of granting users autonomous access to the database at all times. WindoorERP offers a few different methods to reset a user's password.
Tip
To enforce a minimum password length requirement, install the Password Policy (auth_password_policy) module. Then, open the Settings app, navigate to the Permissions section, and enter the desired password length in the Minimum Password Length field. By default, the value is 8.
Reset password
Sometimes, users might wish to reset their personal password for added security, so they are the only ones with access to the password. WindoorERP offers two different reset options: one initiated by the user to reset the password, and another where the administrator triggers a reset.
Enable password reset from login page
It is possible to enable/disable password resets directly from the login page. This action is completed by the individual user, and this setting is enabled by default.
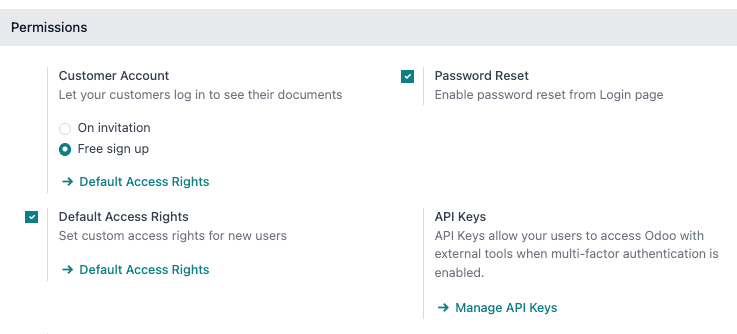
To change this setting, go to Settings app › Permissions section, activate Password Reset, and then click Save.
On the login page, click Reset Password to initiate the password reset process, and have a reset-token sent to the email on file.
Send reset instructions
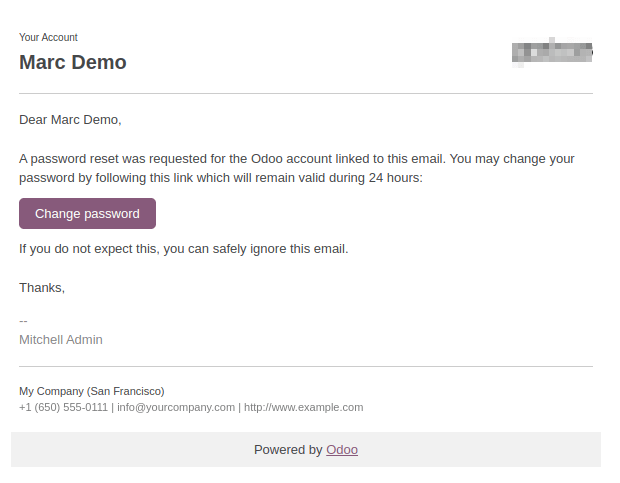
Go to Settings app › Users & Companies › Users, select the user from the list, and click on Send Password Reset Instructions on the user form. An email is automatically sent to them with password reset instructions.
Note
The Send Password Reset Instructions button only appears if the WindoorERP invitation email has already been confirmed by the user. Otherwise, a Re-send Invitation Email button appears.
This email contains all the instructions needed to reset the password, along with a link redirecting the user to a WindoorERP login page.
Change user password
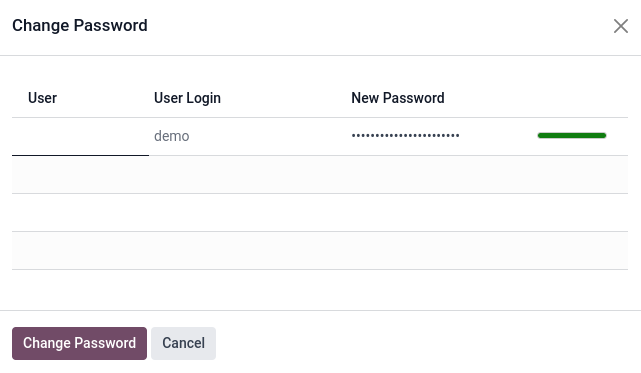
Go to Settings app › Users & Companies › Users, and select a user to access its form. Click on the (Actions) icon, and select Change Password from the resulting drop-down menu. Enter a new password in the New Password column of the Change Password pop-up window that appears, and confirm the change by clicking Change Password.
Note
This operation only modifies the password of the users locally, and does not affect their WindoorERP account.
After clicking Change Password, the page is redirected to a WindoorERP login page where the database can be re-accessed using the new password.
Multi Companies
The Multi Companies field on a user form allows an administrator to provide access to multiple companies for users. To configure a multi-company environment for a user, navigate to the desired user by going to: Settings app › Users section › Manage users. Then, select the user to open their user form, and configure with multi-company access.
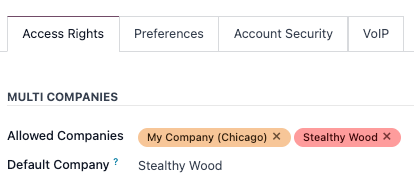
Under Multi Companies in the Access Rights tab, set the fields labeled Allowed Companies and Default Company.
The Allowed Companies field can contain multiple companies. These are the companies the user can access and edit, according to the set access rights. The Default Company is the company the user defaults to, upon logging in each time. This field can contain only one company.
Warning
If multi-company access is not configured correctly, it could lead to inconsistent multi-company behaviors. Because of this, only experienced WindoorERP users should make access rights changes to users for databases with a multi-company configuration. For technical explanations, refer to the developer documentation on ../../../developer/howtos/company.
User types
There are three kinds of user. Filter the Manage Users list by Internal User or Portal User to see who is which.
- Internal — your own staff. They work in the back end and consume a seat on your WindoorERP plan.
- Portal — customers and suppliers who sign in to follow their own documents only. Their rights are pre-set and cannot be picked from the Access Rights tab.
- Public — anonymous visitors on the website front end.
Check the devices a user signed in from
Every login records the device and IP address on the user's profile. Reviewing it now and then is how you notice an account being used by someone else.
- Click your avatar in the upper-right corner and choose My Profile.
- Open the Devices tab. A green dot marks a device that is signed in right now.
- Click a card to see the Last IP Address, First Activity and Last Activity for that device.
- Click Revoke on anything you do not recognise, confirm your own password, and that device can no longer be used to sign in.
Deactivate a user
Users are never deleted — deleting one would break every record they touched. Archive them instead, and their history stays intact.
- Go to Settings › Users › Manage Users.
- Tick the checkbox to the left of the people to deactivate.
- Click the (Actions) icon and choose Archive, then confirm.
An archived user cannot sign in and stops counting against the seats on your WindoorERP plan.
Passwords
Three ways to deal with a password:
- The user resets it themselves. The Reset Password link on the login page emails them a reset token. Turn it on or off under Settings › Permissions › Password Reset.
- You send the instructions. Open Settings › Users & Companies › Users, pick the user, and click Send Password Reset Instructions. The button only appears once they have accepted their invitation — before that you get Re-send Invitation Email instead.
- You set it yourself. On the user form, click the (Actions) icon, choose Change Password, type the new one, and confirm.
To force a minimum password length, install the Password
Policy (auth_password_policy) module, then set
Minimum Password Length under
Settings › Permissions. The default is 8.
Give a user access to several companies
On the user form, under Access Rights › Multi Companies, set:
- Allowed Companies — every company this person may open. Several are allowed.
- Default Company — the one they land in at each sign-in. Exactly one.
Common mistakes
- Deleting a user instead of archiving them — archive keeps the audit trail; delete is refused or destructive.
- Adding more internal users than your WindoorERP plan covers. An overage notice appears first; contact info@windoorerp.com to add seats before the extra accounts are blocked.
- Getting multi-company access half-right: a user allowed into two companies but defaulted into the wrong one will file documents in the wrong entity all day without noticing.
Was this article helpful?
Thanks — your feedback helps.
Running a window or door factory?
Ask for a demo